Thursday, December 31, 2009
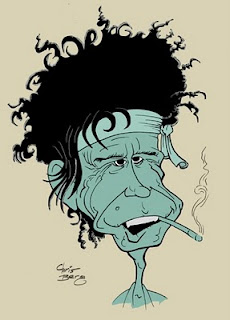
Salvador Dali
Wednesday, December 30, 2009
Sketchbook
Tuesday, December 29, 2009
Keith Richards

Saturday, December 19, 2009
Retirement Caricature
Retirement Caricature
Originally uploaded by GiftCaricature4U
This is a caricature I recently did for a co-worker who recently retired. Her name is Janice and she has just completed 30 years and is ready to give up the blue cube life.
Thursday, December 17, 2009
Wednesday, December 16, 2009
Ten Most Interesting Faces of 2009
Tuesday, December 15, 2009
It's That Time Again

Friday, December 11, 2009
Photoshop Tips
Scanning in B&W Ink Line Art
1. Scan in Gray @ 300 dpi
2. Duplicate Background
3. Erase Background to all white (Control + A to select and then delete)
4. Name duplicate background “line art”
5. On line art layer, apply Gaussian blur at 1 pixel
6. On line art layer, increase contrast to taste
7. On background layer, set to invisible
8. Set line art layer blending options to “multiply”
9. Within blending options, (blend if gray, this layer) set to less 255 until all white disappears.
Scanning in pencil line art
1. Scan in Gray @ 300 dpi
2. Duplicate Background
3. Erase Background to all white (Control + A to select and then delete)
4. Name duplicate background “line art”
5. On background layer, set to invisible
6. Set line art layer blending options to “multiply”
7. Within blending options, (blend if gray, this layer) set to less 255 until all white disappears.
8. Duplicate line art layer (this will make the line art darker if needed)
Color in line art
1. After scanning in either pencil or ink line art
2. Duplicate line art layer if this hasn’t been done
3. Merge both line art layers together (not sure why you need to do this but it works)
4. On layers window, within line art layer, select the checkerboard icon next to lock.
5. Now only visible pixels can be colored
Scan in alternate technique
- Scan line art as grayscale image
- Create a new blank layer, rename it “Line Art”
- Go to the “Channels” palette, there is only one channel called “Gray”
- At the bottom of the channels palette, click the “dashed circle” icon entitled “Load Channel as Selection”
- In “Select” drop down menu, select “Inverse”
- Go to your “Line Art” layer
- Press “D” on your keyboard to reset swathes so full black in active color
- Press “Alt” + “”Delete” to fill selection with black
- On background layer, press “Control” + “A” to select and then “Delete” to delete line art on that layer
- Convert to RGB or CMYK
- This method I found from Tom Richmond’s Blog http://www.tomrichmond.com/blog/2008/06/06/new-photoshop-line-art-trick/ it has the advantage where with the previous technique has a problem that the white areas on the multiply mode are not gone, they are merely inert when in Multiply mode. This means that once you take that final step and “flatten” the image all the white areas combine with the lower color layers and inherent that color.
Color in alternate technique
- Go to the “Channels” palette, there is only one channel called “Gray”
- At the bottom of the channels palette, click the “dashed circle” icon entitled “Load Channel as Selection”
- In “Select” drop down menu, select “Inverse”
- Create new layer above Line Art layer
- Color in lines with wide brush – it will only color in the line art.
Thursday, December 3, 2009
Jason Seiler DVD

Tuesday, December 1, 2009
Tom Richmond


